

What is Google Drive?
Answer: Google Drive is a free file hosting service by Google with 15GB of storage which allow us to host our files for free. Even you can host a website on it too. This is little intro about Google drive and without taking much of your precious time, let us begin the process.Note: I used Google Chrome Browser.
Step 1) Sign-in into your Google Drive Account
Just use your Gmail address to sign into Google Drive Free file hosting service.Also Read:
How to forward GMAIL Emails to any other email account?
How to create a HTML Signature in Gmail with social icons?
Step 2) Uploading your PDF file From Your PC on Google Drive.
One you are logged in, just click on Upload Button > then Files Button.
Step 3) Choose your PDF file from your PC
Now You will be asked to choose what files you want to upload from your PC so just locate your PDF file, select it and press "Open button" in windows dialogue box as seen on below screenshot.
Step 4) Let The Upload Process Complete
As soon as you hit open button, you will see an Uploading box appears. Let the file upload and wait until it shows Upload Complete as you can see in below screenshot. Upload time depends upon the Size of your PDF file and Speed of your Internet Connection.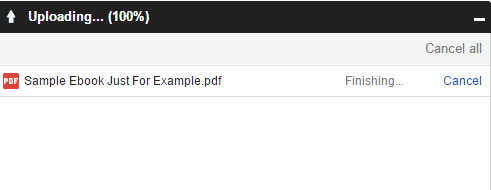
Step 5) Change Its Sharing Settings
Once its Done, just close this box and wait until your PDF file pops up in Google Drive. Then right click on its name > then click on share link > then again click on the share link. See the screenshot below.
Step 6) Click on Advanced Link
When you click on Share button, a dialog box appears with no options to change sharing settings of our file. So click on the little "Advance" link on the bottom left side. See this screenshot below.
Step 7) Click On "Change" Link
After clicking on advance link, we get access to change "Sharing settings". By default this file is Private, means visible to you or those to whom permission is granted. All we have to do is make it "Public on the web" so click on the "change..." link as you can see below image.
Step 8) Make It Public On The Web
This time we get three option to share our file. We need to select very first option which is "Public on web" so select it and hit save button.
Step 9) Open PDF File With Google Drive Viewer
So after we are done with sharing setting, now right click on File link again then click on "open with" and select "Google Drive Viewer" and let the PDF viewer load.
Step 10) Get Code To Embed PDF File
After your PDF file is opened in Google Drive Viewer, just click on "More Actions" link on top. Just hove over top of the ebook and you will see a navbar visible to you. Then click on "Embed item" link as you can see below.
Step 11) Copy The Given Code
Simple step it is :) just copy the code given to you in a dialog box like as below. Then save it to notepad.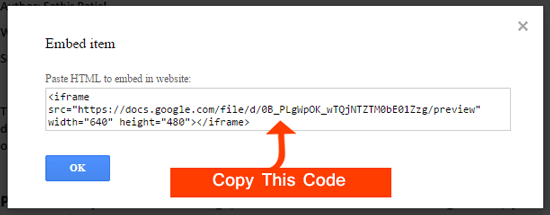
Final Step: Paste Code Inside HTML Editor of Blogger Post
Did you copy this code? Ok so now we are done with Google Drive and its time to actually put this code into work on our blogger blog. Log back to your blogger account, create a new post or open any old post where you wanted this PDF file to be embedded. Select HTML editor of post and paste the code which we had copied.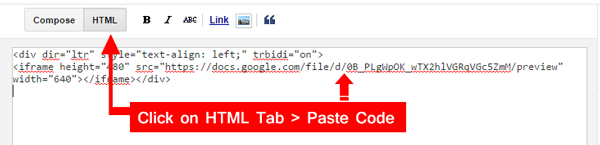
We are almost done! Hit publish button and check your post whether it worked or not.
Recommended: Make Embedded Videos Responsive in Blogger - Add Elegant Frames
Changing Width and Height of the Embedded Document
Optional step but important one. By default, the dimensions of the PDF document are set to 640px wide in width and 480px wide in height. If these dimensions do not fit according to your post area, then just change these pixels accordingly to make it appear fit on your blog post. All you have to do is edit its iframe code inside post HTML. See the example below.<iframe src="https://docs.google.com/file/d/0B_PLgWpOK_wTQjNTZTM0bE01Zzg/preview" width="640" height="480"></iframe>width from 640px to 600px or anything and do the same to height.Live Example of Embedded PDF file
Did you face any problem? Let me know via comments and I'll get back to you with the solution. Do share this post if it helped you.