
There are two types of sitemaps: XML Sitemap and HTML Sitemap. In this article, firstly I will explain about these sitemaps and secondly share the code to add beautiful HTML Sitemap page to blogger.
What is a XML Sitemap Page?
A XML Sitemap is a .xml file attached to your web address. It consists of all pages URL with additional information about each URL that a search engine crawler (bot) uses to navigate the page contents.For instance, https://www.twistblogg.com/sitemap.xml is a XML Sitemap page for our blog. Copy the address, load it, and you’ll have a file downloaded. Open that file to see the contents. The search engine uses the same file to know about published contents. Submission of XML Sitemap page to Google Webmaster Tools assures that the Google bot crawls pages.
Live Demo Of HTML Sitemap for blogger

What is a HTML Sitemap Page?
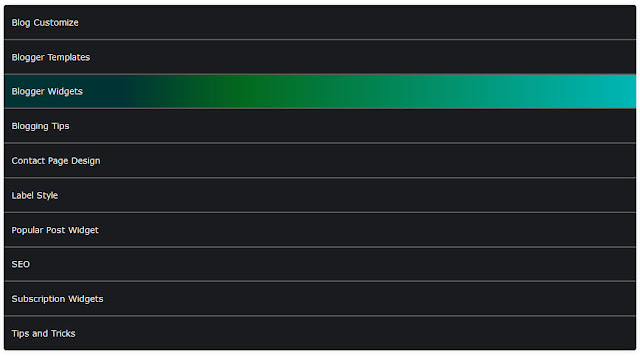
An HTML Sitemap Page is a .html webpage, made up of all published contents organized by labels, dates, or topics. It helps users navigate through the contents easily. For instance, you can check the sitemap page of our blog to find out all published articles organized by labels. Isn’t that cool? Today I’ll share a simple trick to add beautiful HTML Sitemap page to blogger.Features of this premium sitemap page
- Lists articles based on labels.
- Automatically adds "New" tag to latest articles.
- Labels are neatly separated.
- A lightweight Javascript used.
- Beautiful color combination.
- Articles are numbered automatically on each labels.
- Easy for users to navigate through the posts.
- Sorted alphabetically (A to Z).
Live Demo Of HTML Sitemap for blogger
How to add HTML Sitemap Page to blogger?
First of all, we will create a sitemap page from blogger dashboard, and later add the codes.Step 1: Create a Sitemap Page On Your blog
Go to Blogger > Pages > New Page and Enter the title "Sitemap" . Click on Page Settings, modify the page settings as shown below.
Step 2: Adding HTML Sitemap page to blogger
Switch to HTML Editor and Press CTRL + A, remove existing code and paste the following code. Hit Publish and you're done. Now, you have a fresh, stylish, beautiful and premium HTML Sitemap page in blogger./**
* BLOGGER TOC WITH ACCORDION EFFECT (SORT BY LABEL)
* ---------------------------------------------------
* by Taufik Nurrohman
* URL: http://gplus.to/tovic
* Modified by TwistBlogg
* URL: https://www.twistblogg.com
* ---------------------------------------------------
*/
<div dir="ltr" style="text-align: left;" trbidi="on">
<style type="text/css">
.tb-sitemap {
background-color: #222;
color: #ddd;
font-family: Verdana,Geneva,Tahoma,Arial,Sans-serif;
font-size: 14px;
font-weight: 410;
overflow: hidden;
border-radius: 5px;
box-shadow: 0 0 9px rgba(0,0,0,.1);
}
.tb-sitemap .toc-header {
color: #fff;
font-family: inherit;
font-weight: 410;
font-size: 14px;
background-color: #1A1B1E;
margin: 0;
padding: 13px;
overflow: hidden;
cursor: pointer;
border-top: 1px solid #5c5c5c;
border-bottom: 1px solid #5c5c5c;
transition: initial;
}
.tb-sitemap .toc-header:hover {
background: rgb(0,52,52);
background: linear-gradient(90deg, rgba(0,52,52,1) 19%, rgba(3,106,30,1) 38%, rgba(0,182,182,1) 100%);
}
.tb-sitemap .toc-header:before {
content: '';
width: 0;
height: 0;
position: relative;
float:right;
top: 10px;
right: 10px;
border: 5px solid transparent;
border-color: #aaa transparent transparent;
transition: all .3s ease;
}
.tb-sitemap .toc-header.active {
background: #1a1b1e;
color: #fff;
}
.tb-sitemap .toc-header.active:before {
border-color: #fff transparent transparent;
top: 5px;
-webkit-transform: rotateundefined-180deg);
-moz-transform: rotateundefined-180deg);
-ms-transform: rotateundefined-180deg);
-o-transform: rotateundefined-180deg);
transform: rotateundefined-180deg);
}
.tb-sitemap .loading {
display: block;
padding: 14px;
text-decoration: blink;
}
.tb-sitemap ol {
margin: 0;
padding: 0;
list-style: none;
transition: initial;
}
.tb-sitemap li {
counter-increment: step-counter;
line-height: normal!important;
margin: 0!important;
padding: 7px 7px 7px 16px!important;
white-space: nowrap;
text-align: left;
overflow: hidden;
transition: initial;
}
.tb-sitemap li:first-child {
background: rgb(0,52,52);
background: linear-gradient(90deg, rgba(0,52,52,1) 19%, rgba(0,0,0,1) 38%, rgba(71,62,62,1) 100%);}
.tb-sitemap li:nth-child(2n) {
background: rgb(71,62,62);
background: linear-gradient(90deg, rgba(71,62,62,1) 19%, rgba(0,0,0,1) 38%, rgba(0,52,52,1) 100%);}
.tb-sitemap li:nth-child(2n+3) {
background: rgb(0,52,52);
background: linear-gradient(90deg, rgba(0,52,52,1) 19%, rgba(0,0,0,1) 38%, rgba(71,62,62,1) 100%);}
.tb-sitemap li::before {
content: counter(step-counter)'.';
margin-right: 5px;
}
.tb-sitemap a {
color: #fff!important;
text-decoration: none;
font-size: 90%;
transition: initial;
font-weight:normal!important;
}
.tb-sitemap a:visited {
color: #fff!important;
transition: initial;
}
.tb-sitemap a:hover,.tb-sitemap a:visited:hover {
color: #fff!important;
text-decoration: underline!important;
transition: initial;
}
</style>
<div class="tb-sitemap" id="tb-sitemap">
<span class="loading">Sitemap Loading..</span>
<script type="text/javascript">
var toc_config = {
url: 'https://www.twistblogg.com',
containerId: 'tb-sitemap',
showNew: 12,
newText: ' <strong style="font-weight:normal;font-style:normal;color:#000;font-size:11px;background:#fff000;padding:1px 6px 3px 6px;line-height:normal;float:right;border-radius:3px;">New!</strong>',
sortAlphabetically: {
thePanel: true,
theList: true
},
maxResults: 9999,
slideSpeed: {
down: 400,
up: 400
},
slideEasing: {
down: null,
up: null
},
slideCallback: {
down: function() {},
up: function() {}
},
clickCallback: function() {},
jsonCallback: '_toc',
delayLoading: 0
};
</script>
<script src="https://invictusaman.github.io/csshosting/htmlsitemap.js" type="text/javascript"></script>
</div>
</div>
Done !! You've successfully installed beautiful HTML sitemap page in blogger.
Here are a hand picked tutorials for you to read next: